Before work starts
Step 1: Inspection
A roofing contractor inspects the roof covering, ridges, valleys, flashings and gutters, and checks the roof space for water stains, light coming through, rotten timber and the state of any sarking. On older houses, they note any fibro or cement sheeting that might contain asbestos. You should get photos of what they find.
Step 2: Written scope and quote
The quote turns the inspection into a list of work: what comes off, what is replaced underneath, what goes on, how it is fixed and what is excluded. Compare quotes item by item using our roof replacement checklist.
Step 3: Contract and approvals
For residential work above certain values, Queensland law requires a written contract with particular content, and the QBCC publishes guidance on this. If the job needs building approval, a private certifier or council is engaged before work begins. Agree the start date, working hours and how variations will be handled.
On site
Step 4: Set-up and safety
Edge protection, scaffold or harness anchors are installed depending on the height and pitch of the roof. A bin or truck arrives for waste. Driveways, garden beds and pools close to the house may be protected.
Step 5: Asbestos removal, if present
Where the old roof contains asbestos, a licensed removalist removes it first under Workplace Health and Safety Queensland rules. Roofing does not start until that stage is complete and, where required, cleared.
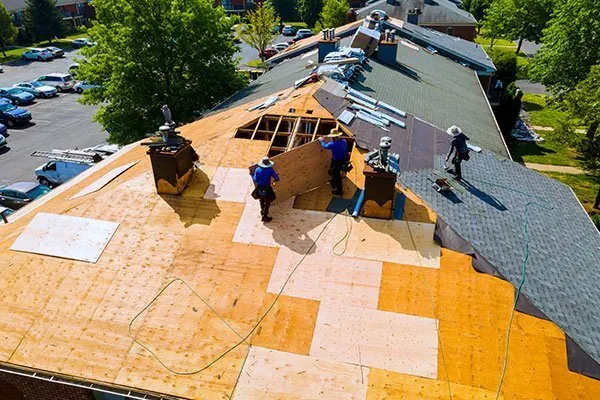
Step 6: Strip-off
The old tiles or sheets come off, usually one section at a time so the house is never left fully open. Old sarking, broken battens and debris are removed.
Step 7: Frame and batten repairs
With the frame exposed, the contractor checks rafters or trusses and tie-downs. Rotten or damaged timber is replaced. Battens are installed to suit the new roofing: steel and tiles need different spacing and fixing.
Step 8: Sarking or roof blanket
A membrane or insulated blanket is laid with the correct laps and drained into the gutter at the eaves. This layer manages condensation, heat and wind-driven rain. See roof re-sarking during replacement for detail.
Step 9: The new roof covering
Steel sheets are laid and fixed with screws suited to the site's exposure, or tiles are laid in courses and fixed or clipped to suit the wind classification. Penetrations such as vents, flues and skylights are flashed as the roof goes on.
Step 10: Ridges, hips, valleys and flashings
On steel roofs, capping and flashings are fixed and sealed. On tile roofs, ridge and hip caps are bedded and pointed. Valleys and wall flashings are completed. These details are where leaks most often start, so they deserve attention.
Step 11: Gutters and downpipes
If included, gutters, fascia and downpipes are installed, with falls toward outlets and enough capacity for summer downpours. Overflow provisions matter on houses with box gutters or concealed gutters.
Finishing up
Step 12: Clean-up
Metal offcuts and swarf are swept from the roof and gutters (left there, swarf rusts and stains new steel), waste is removed and the site is cleaned.
Step 13: Handover
The contractor walks you through the finished roof, provides product details and warranty documents, and explains any maintenance needed. Where approval applied, final inspection and certification documents complete the job.
Common shortcuts to watch for
- Reusing rotten battens, or old battens at the wrong spacing for the new roof.
- Skipping sarking or a blanket, especially under steel.
- Silicone in place of proper flashings.
- Leaving swarf on the roof.
- Using fixings not suited to coastal exposure.
How the steps change for different roofs
On a tile-to-steel job, step 7 changes the most: tile battens come off and steel battens go on at wider spacing, with fixings and tie-downs designed for a lighter, wind-sensitive roof. On a re-tile, step 10 takes longer because ridge and hip caps are bedded and pointed by hand. On an asbestos roof, step 5 is its own project with separate trades and paperwork. On a commercial roof, steps 6 to 10 repeat many times over in small daily sections, with safety mesh and skylight protection added. Knowing which variation applies helps you check that the quote and the schedule reflect it.
Related reading
For timeframes, see how long a roof replacement takes. For what living through the job is like, read what to expect during a roof replacement. For prices, the cost guide has 2026 ranges.
General information for Sunshine Coast property owners, not advice about your particular roof. Rules, products and programs change; confirm with the authority named, or with Sunshine Coast Council or Noosa Shire Council, before acting.